
In preparation for a new class that I recently began teaching, I whipped up a few quilt blocks. This class includes senior citizens with a wide range of sewing skills, including no and low level skills. That’s OK because all that is really needed is the desire to create simple yet beautiful works of art and the willingness to learn. After completion of the first class, I can see where the enthusiasm is high and the creativity is evident. At the conclusion of this six week course my students will have worked collaboratively on a group quilt which is always a fun activity in and of itself. Their quilt will feature the name of their program consisting of pieced letters, appliquéd blocks which reflect their various personalities embellished with basic embroidery stitching, and traditional patchwork such as log cabin blocks. Can’t wait to see the culmination of their creative efforts!
Here are photos of my playful blocks.
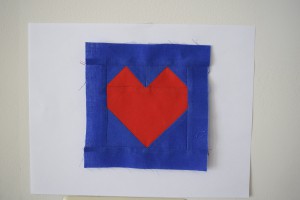
Pieced heart
Here’s how I did it:
Cut four 1-1/2 inch blue squares
Cut two 1-1/2 x 2-1/2 inch red rectangles
Cut two 2-1/2 inch blue squares
Cut one 3-1/2 x 4-1/2 inch red rectangle
Place 1-1/2 inch blue square on corner of 1-1/2 x 2-1/2 inch red rectangle, making sure right sides are facing each other. Stitch on diagonal line drawn from corner to corner on small square. Repeat this step at the opposite corner. Cut excess fabric away a quarter inch from stitched diagonal line. Press seams, usually light on top of dark so red is on top of blue. Make another unit exactly the same way. These two units are stitched together to make the top of the heart. I pressed the seams open to keep unit flat. The bottom of the heart is made in a similar manner. Place 2-1/2 inch blue square on corner of 3-1/2 x 4-1/2 inch red rectangle, making sure right sides are facing each other. Stitch on diagonal line drawn from corner to corner. Cut excess fabric away a quarter inch from stitched diagonal line. Press seam. Repeat this step for the opposite corner. Sew top and bottom units together and press. I added a border around my heart using 1-1/4 inch strips of fabric. This step is up to you. Trim block to desired size.
Appliquéd flower
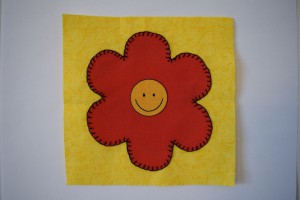
Here’s how I did it: I used a fusible web by Steam-A-Seam 2. (Please note—The directions on the package of the product are easy to follow.)
Draw flower on paper liner of double stick fusible web. I did not have to draw the design in reverse first. Peel off paper and stick to wrong side of appliqué fabric using fingers. (Sometimes the fusible web was not sticky enough to stay on the wrong side of the fabric to cut together. When this happened, I lightly touched with iron for a second.) Cut out paper shape with fabric. Peel off second paper and press shape on foundation fabric using fingers. I used a 6 inch yellow square for my foundation fabric. When satisfied with placement of appliqué, iron to adhere for about 10 seconds. I used black embroidery floss to buttonhole stitch around appliqué. You may choose to use your machine’s buttonhole stitch or even zigzag stitch. Please note, the smiley face in the center was cut from a separate fabric then appliquéd to the red flower.
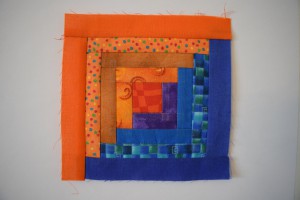
Log cabin block
Here’s how I did it:
I cut out a 1-1/2 inch square for the center. For the strips that surround the center, I cut strips of light and dark fabric 1 inch wide. In a counterclockwise fashion, I stitched strips around alternating light- light to dark- dark fabrics. Of course it’s up to you whether or not you want matching lights or darks. You might even want a scrappier look using entirely different fabrics altogether.
Figurine with heart
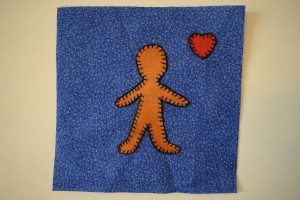
Here’s how I did it:
Done in the same way as appliquéd flower.
I don’t do a lot of fused appliqué work, but I am enjoying their ease of construction. The added benefit of making these blocks is that I get to stitch them on my comfortable sofa right in front of my large screen TV.
Keep your creative juices flowing!
Artfully yours,
Chris